Evaluation time

Meeting the purpose and brief

One of the sole reasons I took this course (other than the carrot that was ‘games design’) was so I can make my ideas into reality. To be able to create I wanted and designed. With this web banner that satisfaction of making my ideas come to life has never been more prominent. So beware as I will be blabbering for the next couple of paragraphs about it.

The banner had to peak people interest before showcasing the product thus it was essential I started with a general eye-grabber (‘Find the clown nose’ which was voted as the best idea by netizens). Then I introduced the personality and mechanics of the game (a witty point and click adventure game) with both character dialogue (written in the way they would speak so that it pleases the existing fanbase) and the click-based interactivity. Upon solving the puzzle (the initial grab), the trailer and links of the product are displayed so that people can now use their new found curiosity to do further investigation (or even consider purchasing). As I’ve described I made sure that my banner fitted with the purpose of entertaining and therefore peak interest in consumers with the Broken Sword brand.

Having a simple and mysterious beginning/concept gave my banner a modern look that is targeted at fresh audiences- it’s a good way to not alienate anyone not familiar with Broken Sword. The banner’s technical specifications also hit the minimum requirements: an original 970×250 banner with more than two interactive elements, produced in Edge Animate. Oh and one more thing polite loading:

Always be polite, is as easy as one click on Edge animate (okay maybe two).

Always be polite, is as easy as one click on Edge animate (okay maybe two).

Technical and aesthetic qualities:

qualities

Production Skills

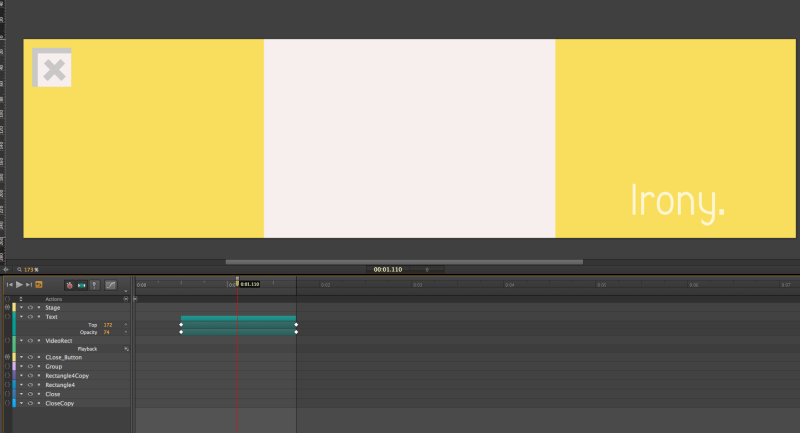
Ideas generation was my strongest point (I never stop having them) and that was further helped by the forum communities that helped me settle on an idea (thank you Broken Sword and ONM forumees!). Once I settled on an idea realising it was part of the challenge, as the flowchart was very vague due to my lack of knowledge of Edge, I didn’t have the strongest planning. It was only when I started to play with the sym.$() elements and labels did I finally construct the scenes I wanted. There was a lot of trials and errors along the way but I finally found a way to organise my timeline after I dipped my toes into the software. In future I can write detailed plans so to waste less time tinkering but this approach to new software has taught me a lot as usual (so I won’t limit myself to what I know but rather what I can discover).

This was one of my first hands on experience with JavaScript (a dumbed down version albeit) and general interactive logic (is all about events and their orders kids) so I wish to further my knowledge in this area. Edge is a software with many potential, even more so with a deeper understanding of JavaScript; which means time for me to go back to code school.

Building the web banner- production log

Screenshot of my workstation.

Screenshot of my workstation. I used a combination of vector (Edge’s in-built shapes)

After placing product images into animation I created the UI using edge's shape tools and text tool.

After placing product images into animation I created the UI using edge’s shape tools and text tool. I used the eyedrop tool to ensure the text elements are the same colour.

The more complex UI such as the link icons and dialouge-boxes elements were created in Photoshop.

The more complex UI such as the link icons and dialouge-boxes elements were created in Photoshop. A lot magic wandin, spot healing and text effecting took place.

To make the objects in the background image clickable, I put invisible rectangles at specific areas. In this scene I played around with the toggle function (the nose toggles on/off.

To make the objects in the background image clickable, I put invisible rectangles at specific areas. In this scene I played around with the toggle function (the nose toggles on/off.

The stop function and Actions keyframe would become crucially useful to me later on. Here I'm using numbers to denote elements but later on this would be changed to labels (a much more flexible method).

The stop function and Actions keyframe would become crucially useful to me later on. Here I’m using numbers to denote elements but later on this would be changed to labels (a much more flexible method). The green bar you see is me keyframing the opacity of find me- I created most of the animations this way.

I have four clickable elements and each of them display different scenerios. In order for this to work I needed to use labels to denote the start, change (when the dialouge box is clicked) and end of each scene.

Everytime the user clicks on the dialogue the text needs to change. Using this function I was able to put that feature in.

I duplicate a textbox and then changed their names and contents. This way I can maintain the same dialogue-box in every scene. The gold two indicators change opacity upon click in order to make it clear who's speaking.

I duplicate a textbox and then changed their names and contents. This way I can maintain the same dialogue-box in every scene. The gold two indicators (a rounded box with a gold stroke made in Edge) change opacity upon click in order to make it clear who’s speaking.

edge animate labels

I have four clickable elements and each of them display different scenarios. In order for this to work I needed to use labels to denote the start, change (when the dialouge box is clicked) and end of each scene. By creating checkpoints in the timeline I was able to control when a scenario played (using play from code snippets). This process is quite complicated at first so make sure you are very organised with your labels.
Screen Shot 2014-01-15 at 12.32.30

Action .stop keyframes and labels make a killer combination just like chocolate and mint.

Display keyframes was also one of my favourites. Here I'm using it to make a dark rectangle appear (I won't spoil why).

Display keyframes was also one of my favourites. Here I’m using it to make a dark rectangle appear (I won’t spoil why).

Hint boxes are very important in delivering instructions to users so I made one in Photoshop.

Hint boxes are very important in delivering instructions to users so I made one in Photoshop (the spoilers are in small text of course, it wouldn’t be fun otherwise).

Screen Shot 2014-01-15 at 11.44.57

I imported the help_box png (turned the display off) and then set up the help_box to hide and show particular elements.

Screen Shot 2014-01-15 at 11.48.44

Don’t forget about the close button! The code is just the reversal/undoing of the code attached to the help_box.

Screen Shot 2014-01-15 at 11.50.46

Embedding the YouTube video, that’s important.

Banner ideas survey

Update: Results are in looks like the clown nose idea is the most popular! Thanks for the feedback, now’s time to make the idea into reality.

Web survey summary

Have a browse at the ideas and choose your favourite in the survey at the bottom of this post.

Idea 1- Anthology of Broken sword games

Banner ideas-numbered

banner-ideas--number-v

Viewers click on each of the roman numbers revealing an iconic (or at least funny) moment from each game. Afterwards the banner fades to the one showing ‘V’ and upon clicking that will reveal promo art, links to the game website/kickstarter (and one to broken sword complete for the newcomers) and trailer of the serpent’s curse.

Idea 2- clown’s nose

Banner-idea--clown's-nose

The objective of this banner is to find the clown nose (which I’m sure you’ve found already) in the scenery (Nico’s apartment). Clicking on different objects will bring up a dialogue box where the main characters of the game engage in nostalgic banter. If viewer finds the clown nose, then a famous quote regarding this nose will come up and a congratulatory message before the banner changes to details about the game.

Idea 3- Look at the artwork progression!

The banner utilizing the lovely artwork for the serpent’s curse by showing the ‘making of’ process via swipe animations. Then George fades in makes a wry comment about the prettiness of the game and a trailer and site links come sweeping in at the end.

Idea 4- Serpent video

 Banner-ideas-video

Using beta footages from the game and the critics’ quotes this banner will be a new trailer that heavily focuses on the video. The mask at the front will display the link buttons to the game site and kickstarter.

Making a close button

This is the beginning of a new frontier. I now know how to create a close button for web banners:

Firstly I created a bunch of shapes in Edge and grouped them.

Firstly I created a bunch of shapes in Edge and grouped them.

Next I added in an action for the button using Edge's default hide template.

Next I added in an action for the button using Edge’s default hide template.

YouTube Masthead Specifications

YouTube Mastheads are sized: 970×250 pixels and if the banner is expandable then 970×500. Strangely YouTube only supports flash based banners. Full Specs:

Formatting

Dimensions:970×250 pixelsFormat:Rich Media Flash based creatives processed through DoubleClick StudioFrame Rate:Up to 24 fpsFlash Versions:Flash Player 10.3 or lower

Load Requirements

Initial Load Size:

50 KB is strongly recommended for fastest initial load time.

Up to 75 KB (including the close button & other mandatory components.)

Subsequent Polite Load Size:

Up to 1.5MB

Video played through the YouTube AS3 Video component is not counted toward the 1.5MB cap.

Includes: additional animation, autoplay, and/or call to action dynamic flashUser-initiated Load Size:Up to 1.5 MB for SWFs (animation/interaction) and 10 MB for non-YouTube served FLV video.

All videos must be progressive load. Cannot be streaming.

CPU Usage:Units containing Flash must not exceed 40% of a user’s CPU. Common causes of high CPU use are continued animation & heavy animation sequences.

Video/Animation

Autoplay Animation/Video Length:

30 seconds

Autoplay Audio:No soundUser-initiated Video:Regardless of the video length, control buttons (mute/unmute and pause/play) are required, as well as indicator of the video duration and elapse status.User initiated videos served from YouTube may have a maximum duration of 1 hour.Each subsequent video play must be user-initiated.Actions on User Click (video):All sound and video must stop upon exit click.Actions on User Click (animation):Animation must stop within 30 seconds after the interaction with it has ended. All sound and animation must stop upon exit click.

Attributes

Border and iFrame:Must stay within iframe and have black border of at least 1 pixel.Mouseover Policy:

No audio or video may be initiated on mouse-over.

Interactive elements can have a mouseover state change for navigational or informational purposes only. State change must disappear upon mouse-off.

Clickable elements can have a mouseover state change with animation under 1 second and must be contained within the clickable area. This animation cannot be disruptive and the cursor may not be altered in any way, unless user-initiated.

Close Button:DoubleClick Studio “Close Ad X” component is required on the top right corner with a padding of 5-10 pixels.Backup Image:

  • Required for all creatives
  • A maximum file size of 50 kB is strongly recommended for fastest initial load time (up to 75 kB accepted)
  • Must have black border of at least one pixel
  • Must not have a close button
  • Should contain a single call-to-action
  • Cannot contain non-functioning buttons, such as controls for video or social media buttons that do not redirect to their respective landing pages
  • Animated .GIFs not supported